Deploying Go Micro Services
This guide covers deploying go-micro services to a Linux server using systemd.
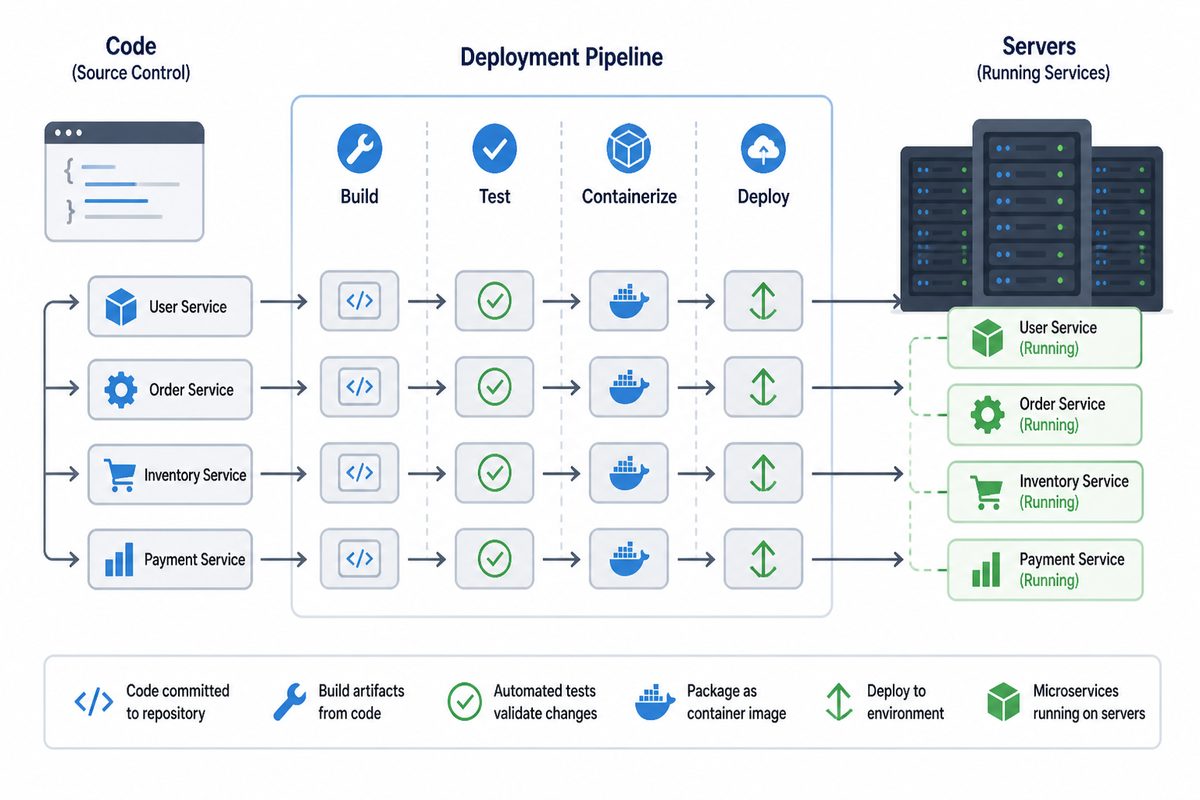
Overview
go-micro provides a clear workflow from development to production:
| Stage | Command | Purpose |
|---|---|---|
| Develop | micro run |
Local dev with hot reload and API gateway |
| Build | micro build |
Compile production binaries for any target OS |
| Deploy | micro deploy |
Push binaries to a remote Linux server via SSH + systemd |
| Dashboard | micro server |
Optional production web UI with JWT auth and user management |
Each command has a distinct role — they don’t overlap:
micro runbuilds, runs, and watches services locally. It includes a lightweight gateway. Use it for development.micro buildcompiles binaries without running them. Use it to prepare release artifacts.micro deploysends binaries to a remote server and manages them with systemd. It builds automatically if needed.micro serverprovides an authenticated web dashboard for services that are already running. It does NOT build or run services.
Quick Start
1. Prepare Your Server
On your server (Ubuntu, Debian, or any systemd-based Linux):
# Install micro
curl -fsSL https://go-micro.dev/install.sh | sh

# Initialize for deployment
sudo micro init --server
This creates:
/opt/micro/bin/- where service binaries live/opt/micro/data/- persistent data directory/opt/micro/config/- environment files- systemd template for managing services
2. Deploy from Your Machine
# From your project directory
micro deploy user@your-server
That’s it! The deploy command:
- Builds your services for Linux
- Copies binaries to the server
- Configures and starts systemd services
- Verifies everything is running
Detailed Setup
Server Requirements
- Linux with systemd (Ubuntu 16.04+, Debian 8+, CentOS 7+, etc.)
- SSH access
- Go installed (only if building on server)
Server Initialization Options
# Basic setup (creates 'micro' user)
sudo micro init --server

# Custom installation path
sudo micro init --server --path /home/deploy/micro

# Run services as existing user
sudo micro init --server --user deploy

# Initialize remotely (from your laptop)
micro init --server --remote user@your-server
What Gets Created
Directories:
/opt/micro/
├── bin/      # Service binaries
├── data/     # Persistent data (databases, files)
└── config/   # Environment files (*.env)
Systemd Template (/etc/systemd/system/micro@.service):
[Unit]
Description=Micro service: %i
After=network.target

[Service]
Type=simple
User=micro
WorkingDirectory=/opt/micro
ExecStart=/opt/micro/bin/%i
Restart=on-failure
RestartSec=5
EnvironmentFile=-/opt/micro/config/%i.env

[Install]
WantedBy=multi-user.target
The %i is replaced with the service name. So micro@users.service runs /opt/micro/bin/users.
Deployment
Basic Deploy
micro deploy user@server
Deploy Specific Service
micro deploy user@server --service users
Force Rebuild
micro deploy user@server --build
Named Deploy Targets
Add to your micro.mu:
service users
    path ./users
    port 8081

service web
    path ./web
    port 8080

deploy prod
    ssh deploy@prod.example.com

deploy staging
    ssh deploy@staging.example.com
Then:
micro deploy prod      # deploys to prod.example.com
micro deploy staging   # deploys to staging.example.com
Managing Services
Check Status
# Local services
micro status

# Remote services
micro status --remote user@server
Output:
server.example.com
━━━━━━━━━━━━━━━━━━━━━━━━━━━━━━━━━━━━━━━━━━━━

  users    ● running    pid 1234
  posts    ● running    pid 1235
  web      ● running    pid 1236
View Logs
# All services
micro logs --remote user@server

# Specific service
micro logs users --remote user@server

# Follow logs
micro logs users --remote user@server -f
Stop Services
micro stop users --remote user@server
Direct systemctl Access
You can also manage services directly on the server:
# Status
sudo systemctl status micro@users

# Restart
sudo systemctl restart micro@users

# Stop
sudo systemctl stop micro@users

# Logs
journalctl -u micro@users -f
Environment Variables
Create environment files at /opt/micro/config/<service>.env:
# /opt/micro/config/users.env
DATABASE_URL=postgres://localhost/users
REDIS_URL=redis://localhost:6379
LOG_LEVEL=info
These are automatically loaded by systemd when the service starts.
SSH Setup
Key-Based Authentication
# Generate key (if you don't have one)
ssh-keygen -t ed25519

# Copy to server
ssh-copy-id user@server
SSH Config
Add to ~/.ssh/config:
Host prod
    HostName prod.example.com
    User deploy
    IdentityFile ~/.ssh/deploy_key

Host staging
    HostName staging.example.com
    User deploy
    IdentityFile ~/.ssh/deploy_key
Then deploy with:
micro deploy prod
Troubleshooting
“Cannot connect to server”
✗ Cannot connect to myserver

  SSH connection failed. Check that:
  • The server is reachable: ping myserver
  • SSH is configured: ssh user@myserver
  • Your key is added: ssh-add -l
Fix:
# Test SSH connection
ssh user@server

# Add SSH key
ssh-copy-id user@server

# Check SSH agent
eval $(ssh-agent)
ssh-add
“Server not initialized”
✗ Server not initialized

  micro is not set up on myserver.
Fix:
ssh user@server 'sudo micro init --server'
“Service failed to start”
Check the logs:
micro logs myservice --remote user@server

# Or on the server:
journalctl -u micro@myservice -n 50
Common causes:
- Missing environment variables
- Port already in use
- Database not reachable
- Binary permissions issue
“Permission denied”
Ensure your user can write to /opt/micro/bin/:
# On server
sudo chown -R deploy:deploy /opt/micro

# Or add user to micro group
sudo usermod -aG micro deploy
Security Best Practices
- Use a dedicated deploy user - Don’t deploy as root
- Use SSH keys - Disable password authentication
- Restrict sudo - Only allow necessary commands
- Firewall - Only expose needed ports
- Secrets - Use environment files with restricted permissions (0600)
Minimal sudo access
Add to /etc/sudoers.d/micro:
deploy ALL=(ALL) NOPASSWD: /bin/systemctl daemon-reload
deploy ALL=(ALL) NOPASSWD: /bin/systemctl enable micro@*
deploy ALL=(ALL) NOPASSWD: /bin/systemctl restart micro@*
deploy ALL=(ALL) NOPASSWD: /bin/systemctl stop micro@*
deploy ALL=(ALL) NOPASSWD: /bin/systemctl status micro@*
Production Dashboard (Optional)
Once services are deployed and managed by systemd, you can optionally run micro server on the same machine to get a full web dashboard with authentication:
# On your server
micro server
This gives you:
- Web Dashboard at http://your-server:8080 with JWT authentication
- API Gateway with authenticated HTTP-to-RPC proxy
- User Management — create accounts, generate/revoke API tokens
- Logs & Status — view service logs and uptime from the browser
The server discovers services via the registry automatically. Default login: admin / micro.
See the micro server documentation for details.
Next Steps
- micro run - Local development
- micro server - Production web dashboard with auth
- micro.mu configuration - Configuration file format
- Health checks - Service health endpoints